Plastic Fantastic
Take your bridal bouquet from faux to show

Creating your own floral arrangements for the big day can save big bucks. A traditional, hand-tied fake-flower bouquet alone could save you $80 to $100, says crafty floral expert Marc Andrzjewski of Upstate New York. “It’s cheaper and you can control exactly what you want,” he says. “And you can’t break them.”

This wedding season, Andrzjewski walks brides step-by-step through one of his favorite DIY projects: using fake flowers to bring your bridal bouquet to life.

diy-plastic-fantastic-01-materials

diy-plastic-fantastic-02-separate-bunches

diy-plastic-fantastic-03-arrange-flowers

diy-plastic-fantastic-04-create-focal-point

diy-plastic-fantastic-05-add-flowers-keep-centered

diy-plastic-fantastic-06-continue-gathering-around-fcenter

diy-plastic-fantastic-07-floral-tape-wrap

diy-plastic-fantastic-08-cut-excess-stems

diy-plastic-fantastic-09-ribbon-wrap

diy-plastic-fantastic-10-pearl-headed-pins

diy-plastic-fantastic-11-finished

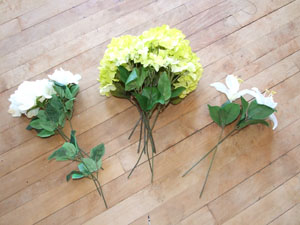
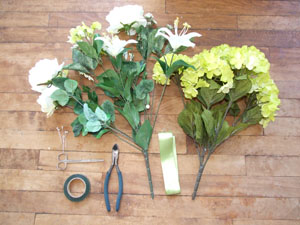
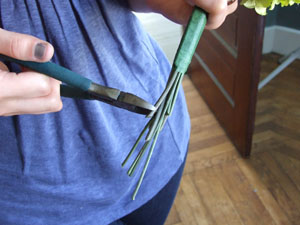
Step 1. Gather the materials.

  1. Consider the style of your wedding—traditional, contemporary, etc.—and what colors you plan to wear and use to decorate. This will help you decide which flowers work best for your ceremony.
  2. Head to your local craft store or any Walmart and select a bagged flower bunch you like. These can be made of silk or similar material, contain either single- or multiple-flower bunches and come with green wire stems. “Real stems can get as expensive as $8 per stem, depending on the flower you want,” says Andrzjewski. “But with bunches, you can get the same kind of flowers and get more out of it. I can get three bunches of flowers at Walmart for only $10.” He also suggests purchasing a variety of flower types, such as daisies, hydrangeas, roses, peonies and chrysanthemums.
  3. You also will need wire cutters, green or white floral tape, ribbon and either crystal or pearl corsage pins.


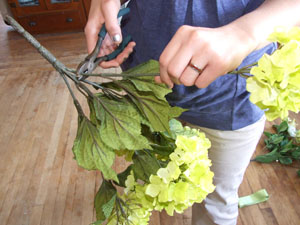
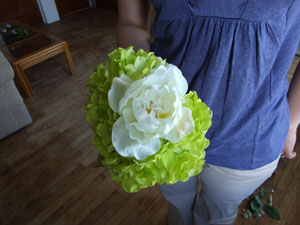
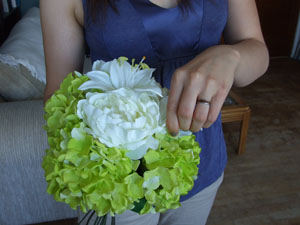
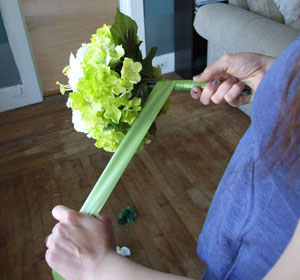
Step 2. Start building.

  1. Group the flowers according to their kind. Then find either the longest or largest flower to use as the centerpiece of the bouquet and hold it in your hand. Andrzjewski recommends a rose. “If you have a real bouquet, you’ll have a lot of tight roses, but with a fake one, they’re a little more open, more textured, so you get more of the beauty of the flower.”
  2. Next, take a different kind of flower, perhaps a hydrangea, and place that to the left of your central rose. Place a second hydrangea to the rose’s right. Then take yet another flower, like a peony, and position one in front of the rose and one in back. “So it looks like a cross with the rose in the middle.”
  3. Once you have your initial cross formation, the rest is up to you. Continue dispersing the flowers in any pattern of your choice around the central rose, until the bouquet is as full as you desire.


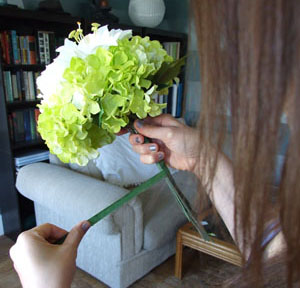
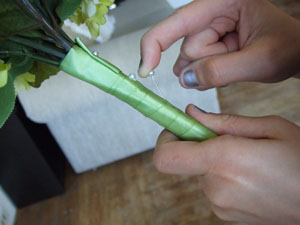
Step 3. Tape it off.

  1. Stretch out the floral tape so that it will adhere to itself, and wrap it around the stems of the bouquet to bind them together and hide the wires. For a shorter bouquet, snip the ends of the stems with wire cutters. Otherwise, you may also wrap the floral tape until it covers the entire grouping of stems.
  2. Maneuver the extra leaves from your purchased flower bunches so that they cover any remaining wires that can be seen. You can hot glue them, and glue the flowers onto the wires for increased security.


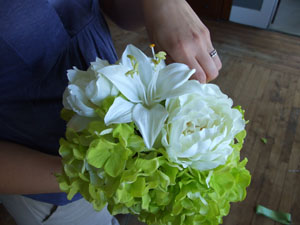
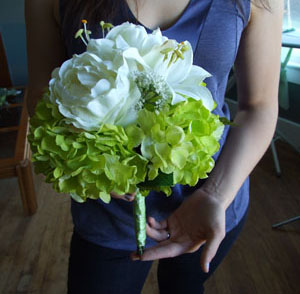
Step 4. Apply extras.

  1. Ribbon will help mask the floral tape and fill in any gaps. Select the color ribbon you wish to use, take one end and lay it vertically on the bouquet. Bring it down to about an eighth of an inch from the bottom of the bouquet, fold the ribbon downward, loop it around the bouquet bottom and fold it into a triangle so that the ribbon is now lying horizontally.
  2. Proceed to wrap the ribbon around the bouquet, overlapping it until you have a solid ribbon the entire bouquet.
  3. Take your choice of corsage pins and, starting at the bottom of the stem, push them sideways into the stem so it holds the ribbon down. Work your way up the stem until you reach the top. Then push the final pins downward so that the needles cannot prick your hands when you hold the bouquet. “So basically you have a line of crystals or pearls just holding that ribbon together, so it looks like a sleeve,” Andrzjewski says. “They’re a little more expensive, but it adds a touch of glitter.”


Bonus step: Now try your hand at smaller, matching bridesmaids’ bouquets!


Photos by Marc Andrzjewski