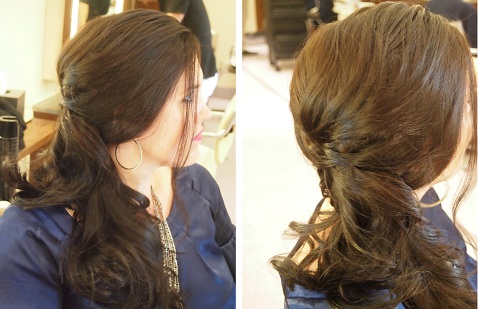
Last week, I visited the newly opened John Barrett Ponytail Bar at the salon’s Bergdorf Goodman Fifth Avenue location in New York City. While I wouldn’t recommend visiting the in-and-out salon for your wedding day, the talented staff quickly creates beautiful styles that are perfect for the pre-wedding soirees. However, stylist Isabel Guillen shared her secrets for a wedding-worthy, elegant but not overdone, side ponytail. Check out our step-by-step for this month’s hairstyle how-to:
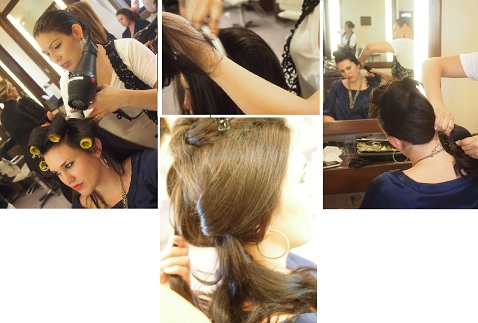
| To create texture, sprinkle texturizing powder throughout your tresses. Bella used Shu Uemera Volume Maker Invisible Texturing Powder, “It’s like foundation for hair,” she explained. | |
| Depending on your natural volume, curl hair with rollers and/or curling iron, and pin them to set. Bella recommends curling forward instead of backward. | |
| Set curls with hairdryer on cool setting and release from pins, massaging the powder throughout to prevent creases and increase texture. | |
| Create a foundation by teasing the crown of your head. “If you don’t do this, it will collapse,” notes Bella. Pin this portion up to use later. | |
| For the remainder of your hair, create a small ponytail to preferred side, pulling at the crown for body. | |
| Take the crown portion of your mane, and create small pieces. For each piece, take a bobby pin to the middle, curl hair around the bobby pin once, and tuck into the ponytail. This creates the twisted texture that makes this look so unique. “It looks more natural, not overly done,” says Bella. | |
| Continue this for the remainder of the hair, onto both sides of the pony. Finish with a styling balm to control flyaways (Bella used John Barrett Be Hold Styling Balm).Tease the end of the pony for volume and set with spray. |
PRODUCTS USED
- Shu Uemera Volume Maker Invisible Texturing Powder
- John Barrett Be Hold Styling Balm
- Shu Uemura Sheer Lacquer
PAST HAIRSTYLE HOW-TOS:


.jpg")