Whimsical Centerpieces: Floral Topiaries for your Spring or Summer Wedding
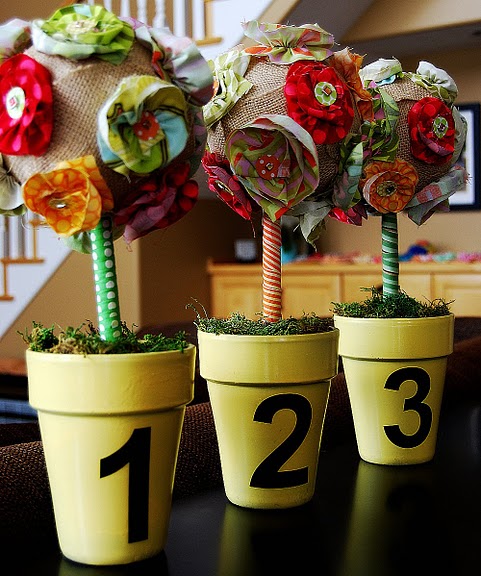
If simplicity isn’t necessarily your style, yet color is still a priority (and really, aren’t gay weddings known for being colorful?), Jennifer Hadfield, accomplished crafter of Tater Tots and Jell-O created these whimsical spring topiaries perfect for centerpieces.
Your finished spring topiaries will not only be both beautiful and functional, but they’ll also appear to be much more complex and complicated than the actual thirteen-step craft journey you have ventured on. Although it will take some time, it’s all worth it when you finish with gorgeous, homemade centerpieces. These unique decorations will differentiate your wedding from other spring and summer receptions and will most certainly leave a lasting impression on your guests.
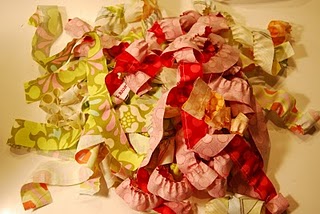
To start, gather your materials. You’ll need your desired amount of terracotta pots, Styrofoam balls and wood dowels, in addition to ribbon, fabric scraps, scrapbook paper scraps, jeweled scrapbook brads, moss, flower-arranging blocks, hot-glue gun, and vinyl numbers or stencils and paint.
DIRECTIONS
Spray paint the pots (3 coats), and stencil or add a vinyl number on each pot.
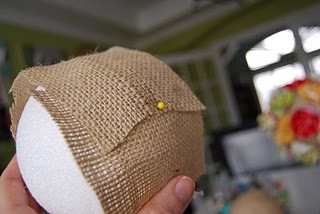
Wrap burlap around the ball to see how long of a strip you need, cut to this length, and cover the ball. Attach with hot glue.
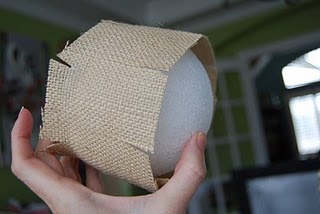
To avoid wrinkles, cut little slits in the sides of the burlap. Run a line of hot glue inside the outer edge of the burlap strip, and press edges down.
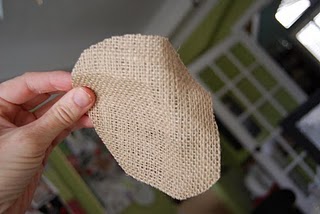
Make 2 oval sections of burlap for each end of the ball.
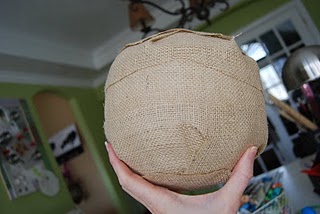
Your burlap ball should look this the one above.
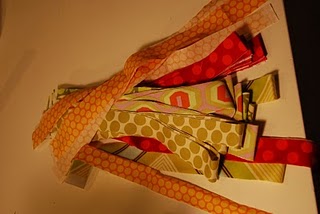
To make the flowers, cut fabric strips (2 inches wide, 20 inches long) to make 14 flowers per topiary.
Make a long running stitch down the middle of each strip either by hand or machine. Gather the thread at one end of each strip and pull to gather material.
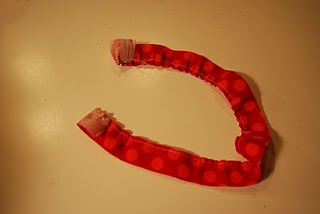
To make strips into flowers, take one end of the strip and make a little fold to the side and add a dab of hot glue. Keep doing this, going in a circular motion and gathering your material as you hot glue it. This may take some time and patience.
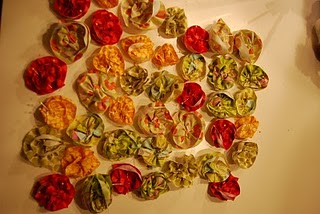
Make sure the flowers are secure by dabbing hot glue under each layer of material until the flower shape is kept. Remove pins once cooled.
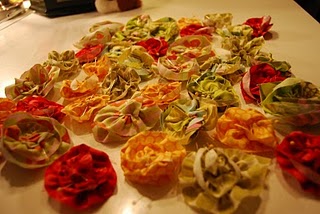
Cut some circles out of scrapbook paper (a suggested three patterns), and put a jeweled scrapbook brad through each circle.

To attach the flowers onto the burlap balls, use straight pins to arrange them on the ball ahead of time. Space the flowers out so that some of the burlap shows though the middle.

Dab some hot glue onto the back of each flower. Put a straight pin back in the middle of the flower to hold the flower onto the ball until the glue cools. Once the glue dries, pull the pins out. Attach the scrapbook paper to the center of each flower with a dab of hot glue. Hold until the glue cools.
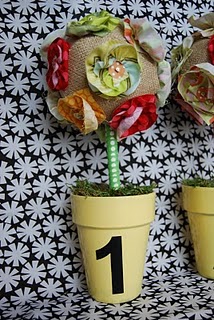
Put a small block of flower-arranging foam in the bottom of each pot. Take the wooden dowel and stick it in the bottom of the burlap flower ball, and then into the center of the pot.
Wrap the dowel in ribbon.
Hot glue a layer of moss over the top of the flower arranging foam.
By Kathryn Allen


.jpg")


.jpg")